
Turning your outdoor area into a beautiful space is fun and rewarding. One great way to do this is by building a wooden arbor in your backyard. It can be a stunning centerpiece, support for climbing plants, or just make your garden look better. Building a wooden arbor is a fantastic DIY project that you can finish in just a weekend.
Key Takeaways
- Wooden arbors can enhance the beauty and functionality of your backyard
- Building a garden arbor is a relatively simple DIY project that can be completed in a weekend
- Choosing the right materials, such as cedar or redwood, is important for long-lasting durability
- Proper anchoring and finishing techniques are crucial for ensuring the stability and appearance of the arbor
- Customization options, like adding a gate or decorative touches, can further personalize your outdoor space
Introduction to Building a Garden Arbor
Building a garden arbor is a fun and rewarding project for homeowners. Arbors can frame a garden entrance, support climbing plants, or create a shaded seating area. A DIY wooden arbor lets you customize it to fit your needs and style.
Reasons for Building a Garden Arbor
There are many good reasons to build a garden arbor for your backyard. These outdoor structures can:
- Make your backyard improvements look better
- Add visual interest and create a focal point
- Provide shade and privacy, making your backyard more inviting
- Offer a sturdy support structure for climbing vines, flowers, or other plants
Benefits of a DIY Wooden Arbor
Building a DIY wooden arbor is a rewarding and budget-friendly project. Some key benefits include:
- Cost savings compared to buying a pre-made arbor
- Ability to customize the design and size to fit your specific needs
- Opportunity to develop your carpentry skills and take pride in a handcrafted project
- Flexibility to stain or paint the arbor to match your backyard’s aesthetic
“Building a garden arbor can be a great way to transform your backyard and create a beautiful, functional addition to your outdoor living space.”
Choosing the Right Materials
When building a wooden arbor for your backyard, picking the right materials is key. The most common woods for arbor design plans and garden structures are cedar, redwood, and pressure-treated pine or fir.
Cedar and redwood are great because they resist rot and insects well. They look beautiful and can make your backyard look even better. Pressure-treated lumber is cheaper but doesn’t look as good as natural wood.
Wood Options for Building an Arbor
- Cedar is a favorite for its natural defense against decay and insects, and its nice reddish-brown color.
- Redwood is also durable and can handle the weather well, keeping strong over time.
- Pressure-treated pine or fir is cheaper but doesn’t look as nice as natural wood.
It’s important to pick wood that’s good for outside use and can handle the weather. This way, your wooden arbor will last long and look great in your outdoor space.
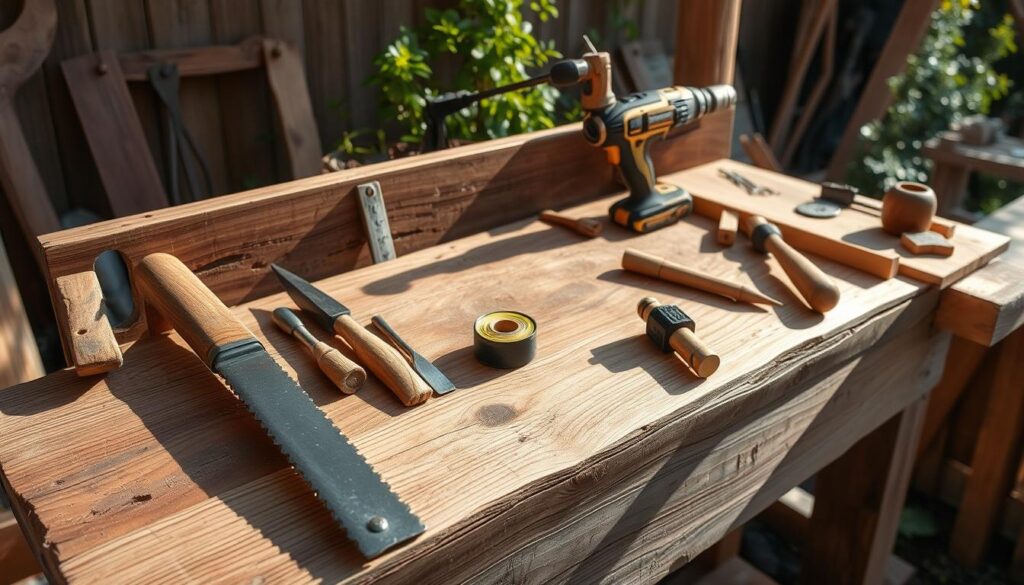
Essential Tools Needed
Building a wooden arbor for your backyard needs the right tools. We’ll show you what you need for a smooth DIY project.
You’ll need a miter saw for precise cuts. A jigsaw is good for curved cuts, but not essential. A drill/driver is crucial for screwing the frame together. A pocket hole jig helps make strong, hidden joints.
Don’t forget basic hand tools like a hammer, chisel, level, and wire cutters. They’re useful for adjusting the frame and cutting lattice pieces.
Always wear work gloves and eye protection for safety. This is important when working on DIY projects.
With the right tools, you can build a beautiful, sturdy arbor. It will make your backyard look great for years.
| Tool | Purpose |
|---|---|
| Miter Saw | Precise cuts on the lumber |
| Jigsaw (optional) | Intricate or curved cuts |
| Drill/Driver | Driving screws and securing the frame |
| Pocket Hole Jig | Creating strong, invisible joints |
| Hammer | Adjusting the frame |
| Chisel | Cutting lattice pieces |
| Level | Ensuring alignment |
| Wire Cutters | Cutting and securing materials |
| Work Gloves | Protecting your hands |
| Eye Protection | Safeguarding your eyes |
“Having the right tools on hand is the key to a successful DIY project. It ensures a smooth and efficient construction process, allowing you to create a beautiful and sturdy wooden arbor for your backyard.”
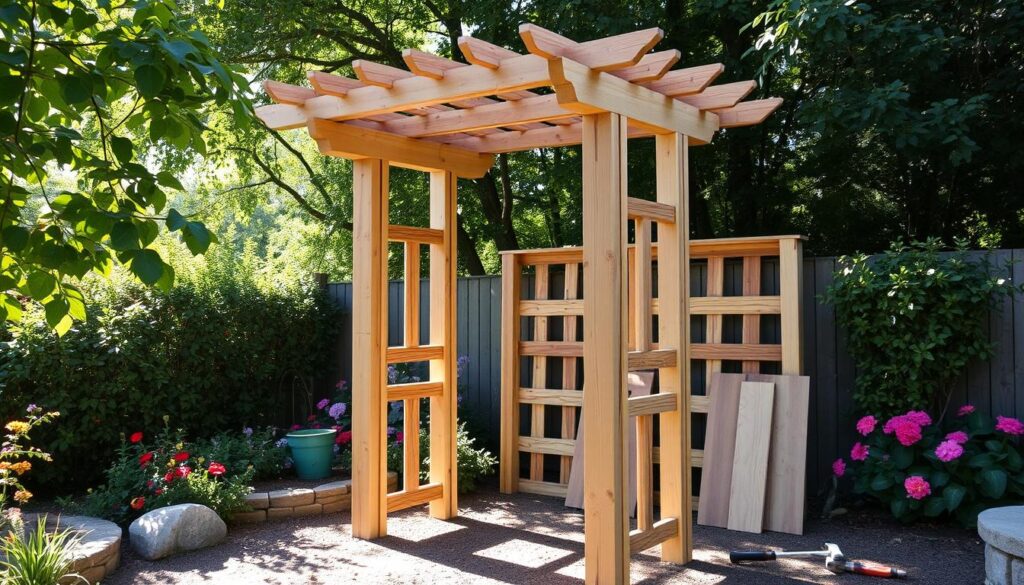
Step-by-Step Instructions
Building a wooden arbor for your backyard is a rewarding DIY project. It adds charm and functionality to your outdoor space. Let’s dive into the step-by-step instructions to bring your arbor building dreams to life.
Digging Post Holes and Setting Posts
Start by measuring and marking the locations for the four posts that will support your arbor. Use a post-hole digger or power auger to create holes that are at least 42 inches deep. This gets below the frost line, ensuring the arbor’s stability, even in cold climates.
After setting the posts in quick-setting concrete and allowing it to cure, you can move on to the next step.
Assembling the Arbor Frame
With the posts firmly in place, it’s time to attach the horizontal beams and vertical supports. Use pressure-treated lumber or cedar boards for a durable and weather-resistant structure. Secure the pieces together with galvanized nails or screws to prevent rust and ensure a sturdy construction.
Installing Rafters and Lattice Top
To complete the arbor, you’ll need to install the rafters and lattice top. Position the rafters, made from pre-cut 2×2 deck balusters, at 9-inch intervals along the crossbeams and secure them with 3-inch deck screws. Then, cut the garden lattice in half and attach it to each side of the arbor using more 3-inch deck screws.
Remember, the arbor project typically requires the better part of a day for construction. An additional half a day is needed for digging holes and placing the structure. With the right materials, tools, and a bit of carpentry know-how, you’ll be well on your way to creating a stunning wooden arbor. It will enhance your backyard for years to come.
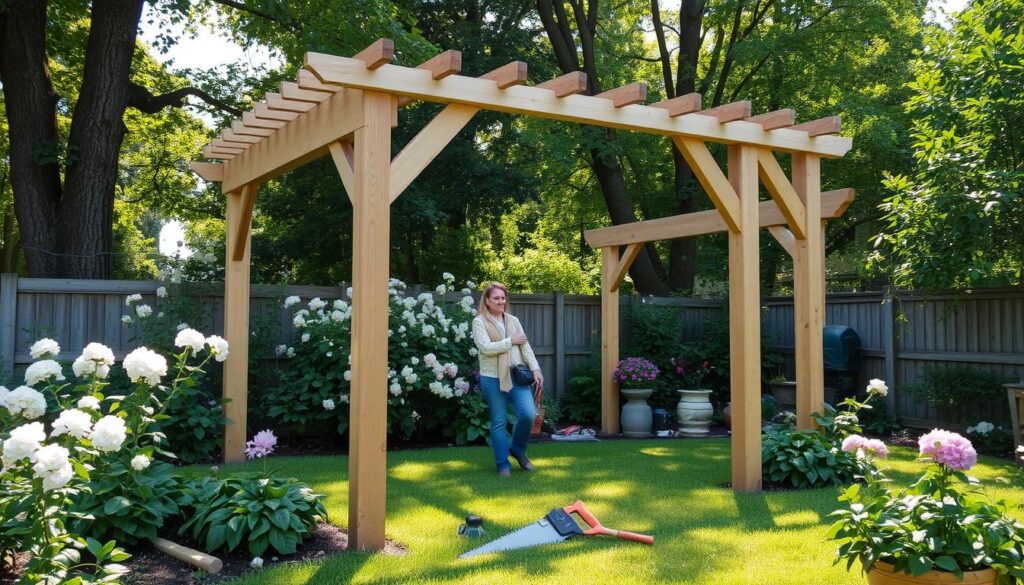
Building a Wooden Arbor for Your Backyard
Building a wooden arbor is a fun DIY project. It can turn your backyard into a stunning outdoor space. With clear instructions and top-notch materials, you can make a strong and beautiful arbor. This will boost your backyard arbor designs, garden architecture, and landscape design.
The guide has 13 printable pages with detailed steps. It also has 50 full-color photos, illustrations, and exploded views. It covers digging holes, setting posts, and building the arbor frame. You’ll learn how to install rafters and a lattice top. The materials are made to last outdoors.
Cedar is a popular wood for arbors because it fights off rot, decay, and pests. The cost of making a wooden arbor varies. It depends on size, materials, and design complexity. Arbors should be tall enough for easy passage but not block sunlight.
“The garden arbor is almost 8′ tall, making it one of the biggest woodworking projects mentioned.”
You can also make a DIY copper arbor for weddings or special events. Use copper piping, fittings, flowers, and more. After the event, turn it into a trellis or photo backdrop for lasting garden style.
Follow the guide and use quality materials. You’ll make your backyard a beautiful and useful outdoor space with a strong, attractive wooden arbor.
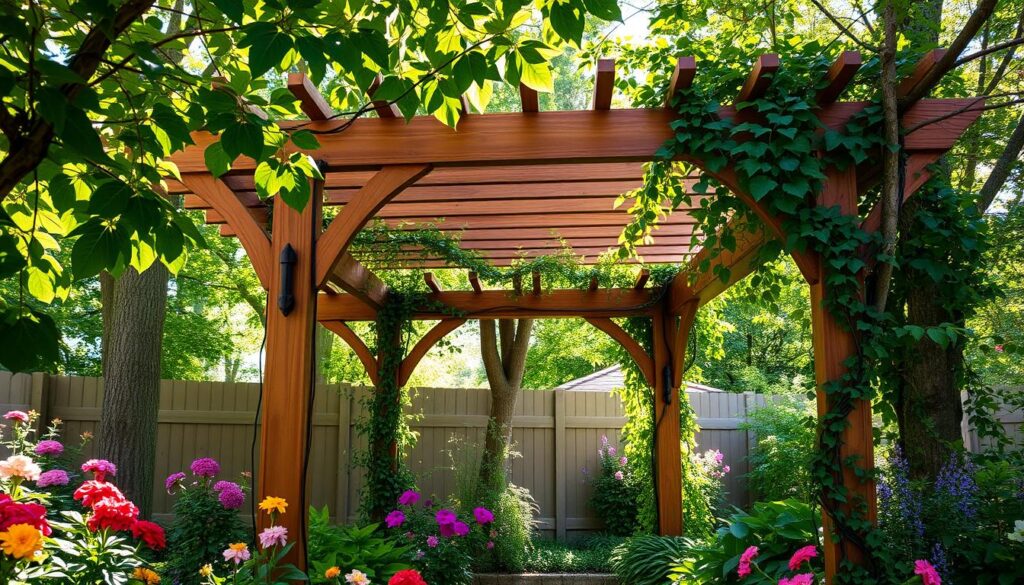
Design Ideas and Customizations
After building your wooden arbor, the fun really starts. It’s time to add your personal touches and make it unique. You can add a charming gate or decorate it in many ways. This lets you turn your arbor into a standout feature in your backyard.
Arbor Gate Addition
Adding a gate to your arbor is a popular choice. It makes a beautiful entrance to your outdoor space. You can choose from a classic wooden gate or a modern metal one. Either way, it adds beauty and function to your garden.
Decorative Touches and Finishes
There are many ways to make your arbor more interesting. You could add curved beams, intricate lattice panels, or a special finish. This can match your garden decor and backyard renovations perfectly. You can also add climbing plants, hanging baskets, or other decorations to make it a outdoor landscaping masterpiece.
With endless arbor design ideas, you can make it truly unique. By adding your personal touches, you can create a focal point that will impress everyone.
“A well-designed arbor can instantly elevate the entire look and feel of your backyard, transforming it into a true oasis of tranquility and beauty.”
Anchoring and Maintenance Tips
It’s key to anchor your wooden arbor right to keep it stable and safe, even when the weather is bad. You can anchor it by setting the posts in concrete, attaching it to a building, or linking it to a fence. Keeping your arbor in good shape means applying a protective finish and checking it often for damage.
Our research showed the arbor had been fixed before but still leaned, showing it needs regular care. Using cement was seen as a smart choice because wood is expensive. The wooden posts used before had problems settling, making the arbor lean.
To anchor it right, we can bury the swing posts about 30 inches deep to avoid frost damage. The hole should be 18 inches wide to fit the 8-inch posts and hold enough concrete. This method worked well for a fire pit pergola swing, keeping it stable for over 8 years.
| Anchoring Method | Benefits |
|---|---|
| Setting posts in concrete | Provides a sturdy, long-lasting foundation for the arbor |
| Attaching to an existing structure | Utilizes the strength of an existing building or fence |
| Securing to a fencing system | Integrates the arbor with the surrounding landscape |
With the right setup and garden maintenance, your DIY wooden arbor will bring joy and beauty to your backyard for years.
Conclusion
Building a wooden arbor is a fun and easy DIY project. It can make your backyard look beautiful and useful. By choosing the right materials and tools, we can make a strong and pretty arbor.
This arbor can be a great addition to your garden. It can frame an entrance, support plants, or add beauty. A custom-built wooden arbor is a valuable and lasting part of your outdoor space.
In this project, we learned to use the right materials. We used 2x8s for the frame and stainless steel screws for durability. We also found out how important power tools like the Dewalt 12-inch miter saw are for precise cuts.
Wearing safety gear like eye and ear protection is crucial. We applied Valspar One-Coat Exterior Stain and Sealer in Stonybrook color for a beautiful finish. Titebond III Ultimate Wood Glue helped secure the top pieces to the cross bars.
Now, we can be proud of our DIY skills and the new look of our outdoor space. You can decorate your arbor with climbing roses, clematis, or wisteria. This beautiful structure will become a favorite part of your backyard.
Remember, taking care of your arbor is important. Regular staining or sealing keeps it looking great for years. With some effort and creativity, we can all enjoy a custom-built wooden arbor in our backyards.
FAQ
Q: What are the most common wood options for building a wooden arbor?
A: Cedar, redwood, and pressure-treated pine or fir are top choices for arbors. Cedar and redwood resist rot and insects well, perfect for outdoors. Pressure-treated lumber is cheaper but less attractive than natural wood.
Q: What tools are needed to build a wooden arbor?
A: You’ll need a miter saw, jigsaw (optional), drill/driver, and a pocket hole jig. Also, a stapler, wire cutters, and hand tools like a hammer and level. The right tools make building easier and faster.
Q: What are the key steps in building a wooden arbor?
A: Building a wooden arbor involves several steps. First, dig holes for the posts and set them in concrete. Then, assemble the frame and add rafters and a lattice top.
Start by marking where the posts will go. Use a digger or auger to make holes 42 inches deep. Set the posts in concrete and let them cure. Next, attach the beams and supports to form the frame.
Finally, add the rafters and lattice or slats for the top. This completes your arbor.
Q: How can I customize and personalize the design of my wooden arbor?
A: You can make your arbor unique by adding a gate or decorative touches. Use curved beams, lattice, or different finishes to match your style. You can also add climbing plants or hanging baskets for extra charm.
Q: How do I anchor and maintain my wooden arbor?
A: Anchoring your arbor is key to its stability. You can use concrete, attach it to a building, or secure it to a fence. Regularly check and maintain your arbor with a protective finish and inspections for damage.