
Growing your own plants from scratch offers a unique thrill that transforms gardening into an adventure. Imagine nurturing tiny specks of life into robust seedlings, ready to thrive outdoors. This method isn’t just practical—it’s a gateway to exploring rare heirloom varieties and exotic cultivars you’ll rarely find at local nurseries.
Why do so many gardeners swear by this approach? For starters, it’s cost-effective. A single packet often yields dozens of plants for less than the price of one store-bought transplant. You’ll also gain weeks of growing time, especially in regions with shorter warm seasons. Picture harvesting tomatoes weeks earlier than neighbors who rely on pre-grown options!
Beyond savings, there’s unmatched satisfaction in overseeing every growth stage. You control the soil mix, light exposure, and watering schedule—factors that shape healthier, sturdier plants. It’s like being both scientist and artist, tweaking variables to create your ideal green companions.
Key Takeaways
- Access unique plant varieties unavailable as nursery transplants
- Significantly reduce gardening costs compared to buying mature plants
- Extend your growing season by weeks for earlier harvests
- Develop stronger seedlings through customized care routines
- Experience the joy of nurturing plants from their earliest stages
Introduction to Indoor Seed Starting
Imagine harvesting ripe tomatoes while neighbors are still planting seedlings—this power lies in mastering indoor germination. For plants needing extra weeks to mature, like peppers or petunias, beginning early becomes non-negotiable. Cold soil and lingering frost dates make direct outdoor planting risky for heat-loving varieties.
Why Start Seeds Indoors?
Long-season vegetables like eggplants demand 10-12 weeks indoors before transplanting. Check seed packets for crop timelines—they’ll tell you exactly when to begin. By syncing indoor sowing with your last spring frost date, you’ll have sturdy plants ready when soil warms. This method works wonders for slow-growing annuals like marigolds too.
Benefits for the Home Gardener
Warm potting mixes speed up germination, giving roots a healthy boost that outdoor conditions can’t match. You’ll save money too—growing 50 tomato plants from one $4 packet beats buying pricey nursery starts. Control every variable: light duration, moisture levels, and nutrient blends create vegetable champions prepared for garden life.
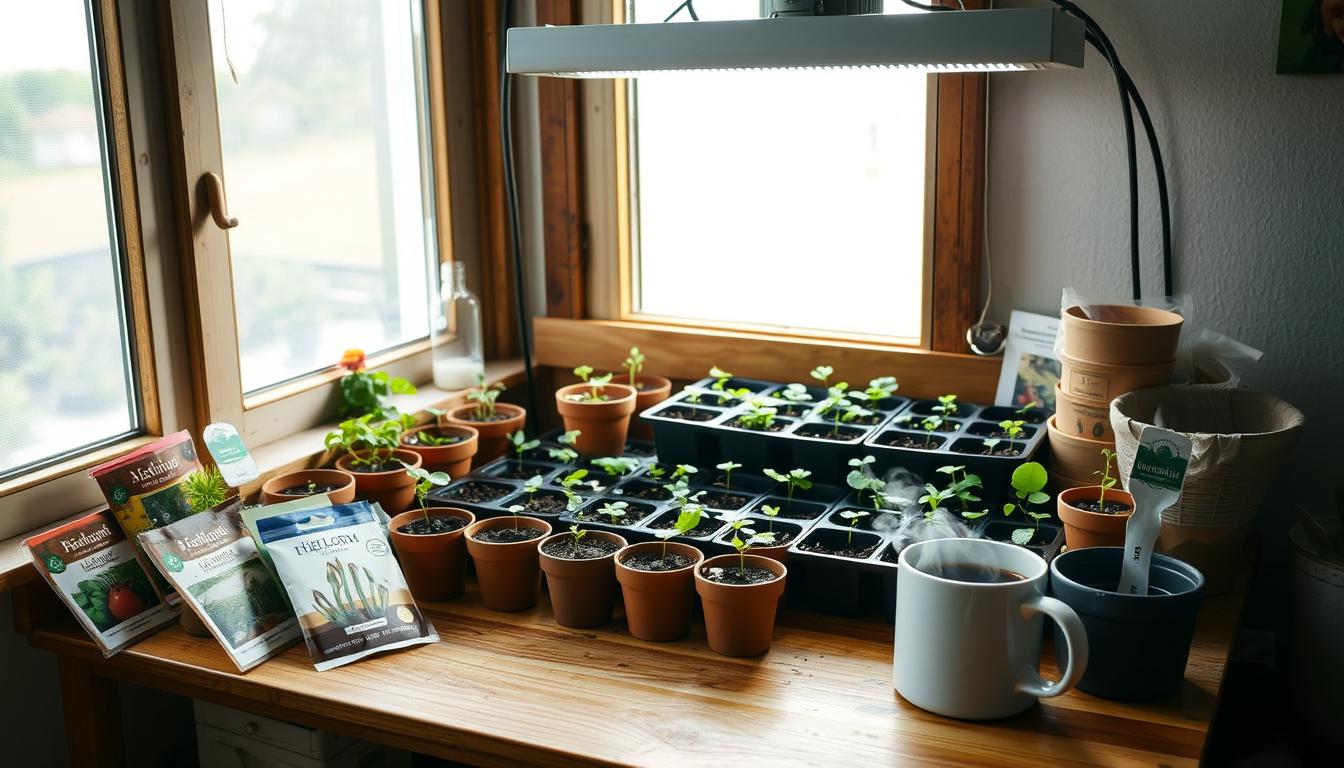
Essential Supplies for Successful Seed Starting
The foundation of robust seedlings begins long before the first sprout appears—it starts with gathering the right tools and materials. Your container choices and growing medium directly impact root development and disease prevention. Let’s explore what truly works for nurturing delicate young plants.
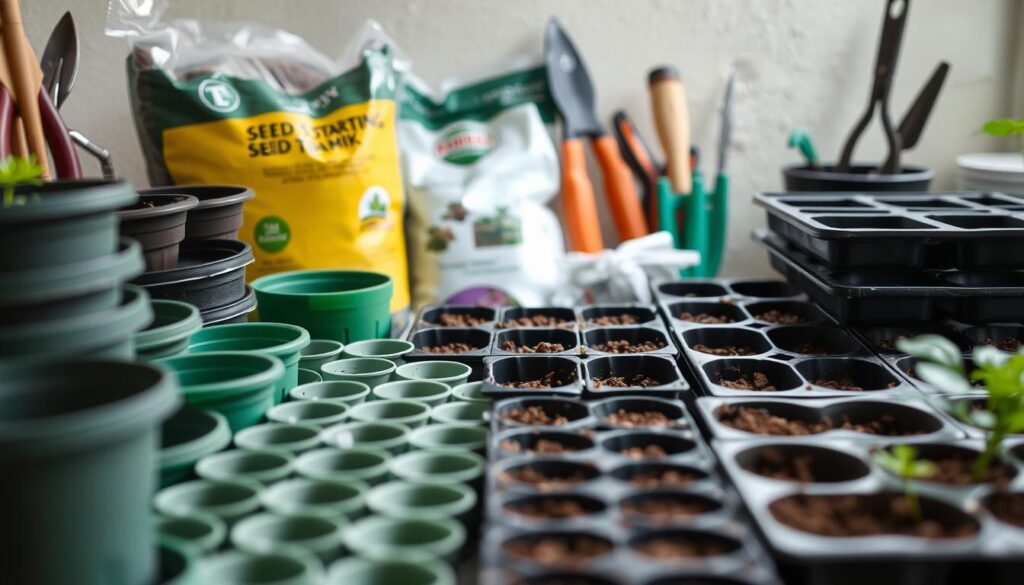
Recommended Containers and Tools
Cell flats—plastic grids with individual compartments—are my go-to for efficiency. These fit snugly into standard trays, creating a compact nursery. Small plastic pots (2-3 inches wide) also work well, provided they have drainage holes at the base. I’ve reused yogurt cups for years—just poke holes in the bottom!
Proper drainage prevents waterlogged roots, a common killer of seedlings. If you’re reusing old containers, scrub them with a 10% bleach solution. This eliminates harmful pathogens from previous seasons. Trays beneath pots catch excess water while keeping surfaces tidy.
Choosing the Right Potting Mix
Garden soil is too dense for tender roots. Commercial potting mixes, however, offer the perfect balance. Look for blends with peat moss and vermiculite—they’re lightweight and retain moisture without becoming soggy.
These sterile mixes eliminate weed competition and reduce disease risks. I avoid adding fertilizers initially; young plants thrive on the mix’s natural structure. When filling containers, gently press the mix to remove air pockets—this ensures good root-to-soil contact.
Your seedlings’ first home matters more than you might think. With the right containers and mix, you’re setting the stage for vigorous growth that continues outdoors.
Preparing Your Seed Starting Area for Optimal Germination
The secret to sprouting success lies in crafting the perfect germination haven. Your setup isn’t just about pots and soil—it’s about creating a stable environment where life can burst through dormant shells. Location matters as much as technique here.
Setting Up a Clean, Safe Location
I always choose spaces far from chaos. High-traffic zones risk knocked-over trays, while curious pets might dig up your work. Basements often shine here—their steady temperatures prevent the wild swings that stress delicate sprouts. Avoid drafty windowsills where midday sun could fry tender roots by noon.
Cleanliness is non-negotiable. Wipe surfaces with vinegar solution before arranging trays. This simple step prevents mold and bacteria that thrive in moist conditions. If your space feels chilly, a heating mat under trays keeps soil cozy without overheating the air.
Ideal Temperature and Humidity
Most plants wake up best in soil warmed to 68°–86°F. I use a probe thermometer to check daily. If readings dip, heating mats boost warmth precisely where roots develop. Air humidity needs balance—too much invites fungus, too little dries out casings.
Clear plastic domes trap moisture during early growth phases. Lift them daily for airflow, removing condensation with a towel. Once sprouts appear, reduce water slightly to encourage stronger stem growth. Remember: consistent care beats perfect conditions every time.
Mastering Starting seeds indoors
Timing separates thriving seedlings from struggling plants. Many gardeners jump the gun, sowing weeks before their climate allows. Those eager sprouts stretch toward inadequate light, becoming spindly and weak. I’ve learned this lesson firsthand—once transplanted, leggy plants often snap in wind or fail to establish strong roots.
Your last frost date holds the key. Count backward using the “weeks to transplant” number on every packet. A tomato needing 6 weeks indoors? If frost typically ends May 1, sow around March 20. This math prevents overcrowded windowsills and stressed plants racing against calendar pages.
Quick growers like basil thrive with just 4 weeks indoors. Slowpokes—think celery or onions—demand 12-14 weeks. Match each variety’s needs to your local spring thaw. I keep a spreadsheet with frost dates and crop times, adjusting annually based on weather patterns.
Resist the “earlier is better” myth. Stocky, compact seedlings adapt better to outdoor life than overgrown ones. Track sowing dates religiously, and you’ll greet transplant day with robust plants primed for success. Patience here pays dividends all season long.
Techniques for Sowing and Labeling Your Seeds
Even seasoned gardeners face pitfalls when transferring tiny specks of life into soil. Precision matters here—a millimeter too deep or a hasty label can derail weeks of effort. Let’s refine your approach to turn uncertainty into consistent sprouting success.
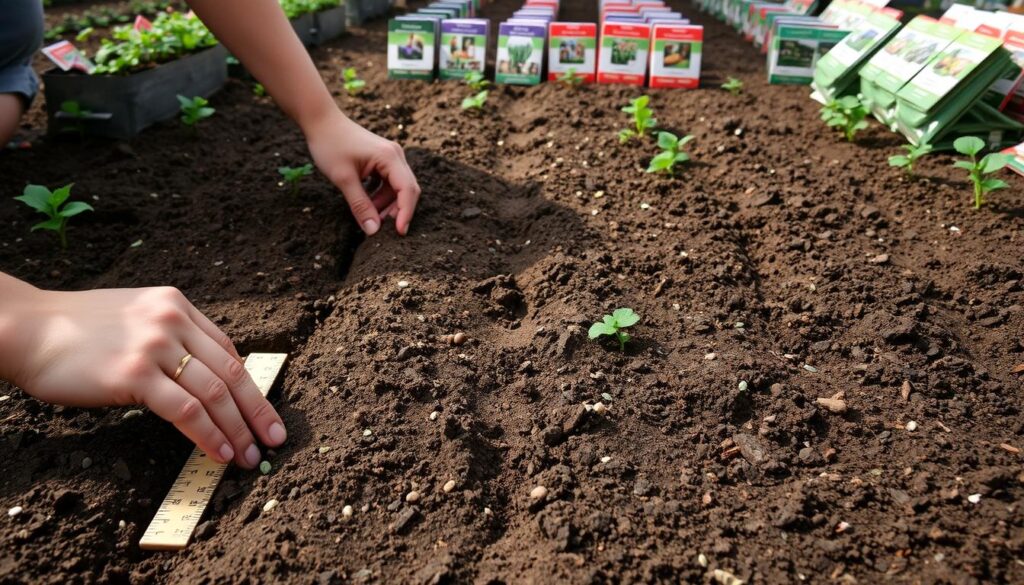
Sowing Depth, Spacing, and Covering Methods
Here’s my golden rule: bury seeds twice their width. A pea-sized seed? Plant it ¼ inch deep. For dust-like petunia seeds, I sprinkle them on the surface and press gently—no covering. They need light to wake up. Larger varieties like beans get tucked deeper with a pencil eraser.
In each container, I nestle 2-4 seeds. Why? Some might dud, and thinning later ensures the strongest survive. After placing them, I mist the potting mix to settle it naturally. Never pack soil—roots hate cramped spaces.
Effective Labeling and Tracking
Waterproof markers on plastic tags save me yearly. I note the variety and sow date, sticking labels at the container’s edge. For trays with multiple crops, a numbered grid in my notebook cross-references each cell.
Two weeks post-sowing, I thin seedlings ruthlessly. Snip extras at soil level—no tugging! This gives survivors room to bulk up. With organized records, I never face the “mystery plant” dilemma come transplant day.
Balancing Water, Light, and Heat for Vigorous Growth
The difference between thriving seedlings and struggling ones often comes down to three elements. Like a botanical orchestra, water, light, and heat must work in harmony to create robust plants. Too much of one throws the entire system off-key.
Watering and Moisture Management
Young plants need consistent moisture—not a swamp. I check soil daily by pressing a finger into the mix. If the top ¼ inch feels dry, I water until droplets appear in tray reservoirs. Overwatering causes yellow leaves and limp stems, while underwatering leads to crispy edges.
Morning watering works best. It gives excess moisture time to evaporate before cooler nights. I avoid wetting leaves directly—damp foliage invites fungal issues. A table below shows ideal watering frequencies:
| Plant Type | Water Frequency | Signs of Stress |
|---|---|---|
| Tomatoes | Every other day | Curling leaves |
| Peppers | Every 3 days | Drooping stems |
| Lettuce | Daily | Brown tips |
Utilizing Artificial and Natural Light
Windowsill light alone creates leggy, weak stems. My LED grow lights hover 3 inches above plants—close enough to prevent stretching. I use timers for 14-hour daily cycles. Darkness matters too—plants process nutrients during rest periods.
True leaves signal feeding time. Those first rounded leaves (cotyledons) use stored energy. When serrated true leaves emerge, I mix half-strength fertilizer into water weekly. This fuels growth without burning delicate roots.
Transplanting Your Seedlings with Care
The moment your seedlings outgrow their nursery pots marks a critical growth phase. Proper technique here determines whether plants thrive or falter. I’ve found that gentle handling and strategic timing turn this stressful process into a growth accelerator.
When and How to Transplant
Watch for the first set of true leaves—those distinct from the initial rounded sprouts. This signals roots have filled their current container. Move plants to pots just 1-2 inches wider. I slide a spoon under the rootball to lift without tearing delicate roots.
Always grasp cotyledons (seed leaves) if steadying from above. Stems bruise easily, stunting growth. For tangled seedlings, I tease roots apart with a toothpick while keeping them moist. Air pockets in fresh potting mix? Gently tap containers to settle soil naturally.
Preventing Root Damage
Prepare new containers with pre-moistened mix matching the original’s texture. Create holes deep enough to bury stems up to the lowest leaves. After placing each seedling, water lightly to eliminate gaps around roots.
Shield transplants from direct sun for 48 hours. I use sheer curtains to filter light while plants adjust. Resume regular watering only when the topsoil dries slightly—overhydration now invites rot.
Hardening Off: Getting Your Seedlings Ready for the Outdoors
The final test for your nurtured seedlings comes when moving them outside—skip this step, and weeks of care could vanish overnight. Hardening off bridges the gap between controlled indoor environments and nature’s unpredictability. This 7-14 day transition strengthens cell walls and boosts resilience against sun, wind, and temperature swings.
Gradual Exposure to Outdoor Conditions
Begin two weeks before planting day. Place plants in dappled shade for 2-3 hours, avoiding midday intensity. I use a folding table under a tree for wind protection. Each day, extend outdoor time by an hour while introducing morning sunlight.
By day seven, seedlings handle 6 hours of direct light. Watch nighttime forecasts—any frost risk means bringing plants inside immediately. By week’s end, they’ll sleep outdoors if temperatures stay above 45°F.
Monitoring Seedling Health During Transition
Leaves tell the story. Slight wilting post-sun exposure is normal, but crispy edges signal overexposure. I rotate pots daily to prevent uneven growth. Reduce watering slightly—outdoor evaporation rates differ from indoor conditions.
If stems appear leggy, delay planting and increase light gradually. Sturdier plants adapt faster to garden beds. Don’t rush this process—patience here ensures your efforts bloom into harvests.
FAQ
Q: What’s the main advantage of beginning my garden with indoor planting?
A: I find it gives me control over early growth stages, extends the growing season, and often results in stronger plants compared to direct sowing. It’s especially useful for crops like tomatoes or peppers that need longer warmth.
Q: Can I reuse old containers for my setup?
A: Yes, but I always sterilize them first with a 10% bleach solution to prevent disease. Ensure containers have drainage holes—yogurt cups or egg cartons work if you poke holes in the bottom.
Q: How do I pick the best soil mix for germination?
A: I avoid garden soil—it’s too dense. A sterile, lightweight blend like Espoma Organic Seed Starter ensures proper aeration and moisture retention. Look for mixes labeled specifically for seedlings.
Q: What temperature range encourages quick sprouting?
A: Most vegetables thrive between 65–75°F. I use a heat mat for warmth-loving plants like eggplants. Once leaves emerge, I lower temps to 60–65°F to prevent leggy stems.
Q: How deep should I bury tiny seeds like lettuce?
A: I follow the “rule of thumb”: plant twice as deep as the seed’s width. For lettuce, that’s barely covered—just press them gently onto damp mix and mist lightly. Larger seeds like beans go deeper.
Q: Why are my sprouts stretching toward the window?
A: They’re craving more light. I use LED grow lights 2–4 inches above seedlings for 14–16 hours daily. Rotate trays every few days to keep growth even if using natural light from a south-facing window.
Q: When is it safe to move plants to bigger pots?
A: I transplant once the first true leaves form—usually 2–4 weeks after sprouting. Handle stems carefully, and lift by the leaves to avoid root damage. A diluted fish emulsion fertilizer helps reduce transplant shock.
Q: How do I prepare my seedlings for outdoor life?
A: I start hardening off 7–10 days before planting outside. Begin with 1–2 hours of shaded outdoor time, gradually increasing exposure. Protect them from wind and frost, and always check weather forecasts.
Q: Can overwatering harm young plants?
A: Absolutely. I water only when the mix surface feels dry. Bottom watering in trays prevents soggy soil and reduces fungus risks. A small fan nearby improves airflow, which also discourages mold.
Q: Should I thin crowded seedlings?
A: Yes—crowding stunts growth. I snip weaker sprouts at soil level with scissors instead of pulling, which disturbs roots. For tomatoes or flowers, I sometimes separate and repot strong extras.